Behind The Seams

Ramblings of a sewing fanatic

My Photo
Name:
Location: Fashion Hell, Florida, United States

Saturday, September 30, 2006

No big surprise - I'm mostly right-brained

You Are 25% Left Brained, 75% Right Brained

The left side of your brain controls verbal ability, attention to detail, and reasoning.
Left brained people are good at communication and persuading others.
If you're left brained, you are likely good at math and logic.
Your left brain prefers dogs, reading, and quiet.

The right side of your brain is all about creativity and flexibility.
Daring and intuitive, right brained people see the world in their unique way.
If you're right brained, you likely have a talent for creative writing and art.
Your right brain prefers day dreaming, philosophy, and sports.

Sunday, September 24, 2006

One last time - McCall's 5137

I hadn't planned on making this dress yet again but when I tore the hemline of my magenta dress, I decided to whip another one up yesterday. You see, I'm headed to the beach today for a couple of days and these little rayon dresses are so nice to toss on. The fabric is a rayon challis with a hand-painted look that I purchased from Elia's Fabrics in Miami a few years ago. Oh yes, I've heard the rumors that this style is going out fast but am blissfully unconcerned! This is, after all, a summer dress with a short lifespan. Be back in a few days - I hope to return refreshed and rarin' to go. Stay tuned for the Hot Patterns Sunshine Top!


PS: My email box is jam-packed! If you've recently sent me an email, I am going to try to get through all of my mail this week. No emails about Project Runway, please! I won't get to see this week's episode until Friday. Auf Wiedersehen!

Saturday, September 23, 2006

Tutorial: Convertible Collar with Yoke

A few days ago I was asked to republish the convertible collar tutorial that I had on my now-defunct GigiSews.com site - here it is! As always, it's so much easier to use 1/4" seam allowances in this area. Your stitching will be easier, more accurate and you won't have to trim. Here, I am using Kwik-Sew 2935 which includes 1/4" seam allowances throughout.

I've increased the seam allowances in some areas (the side seams and sometimes the armscye) to give me the option of using flat-felled seams or even plain seams, depending on the project. There's nothing wrong with using a 1/4" throughout but I think that larger seam allowances and other seam finishes add more perceived value to the garment. Still, all of your enclosed seams should be 1/4" - always, IMO.

With the exception of the collar, do not press anything until the end.


Step 1: 
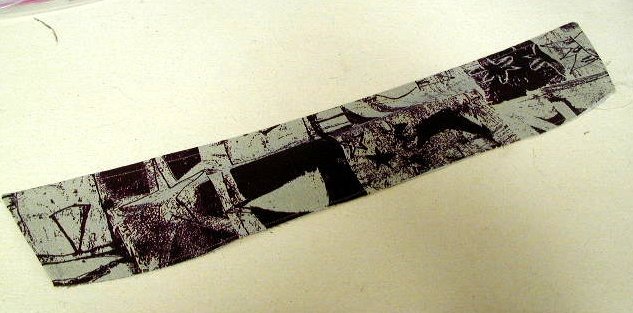
Construct the collar. I always put a large X with chalk on the undercollar so as not to mix them up.

Step 2: Construct the inner yoke/front facing unit. The inner edges of your facings should be finished in some manner. Here, I've simply turned in 1/4" and edgestitched.

Step 3: 
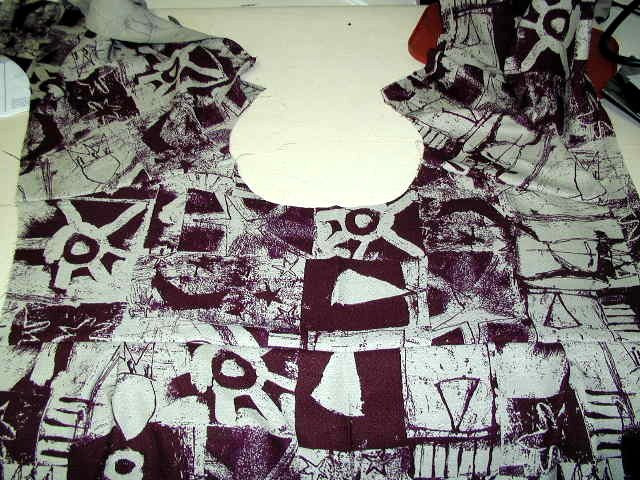
Attach the outer yoke to the front and back sections.

Step 4: 
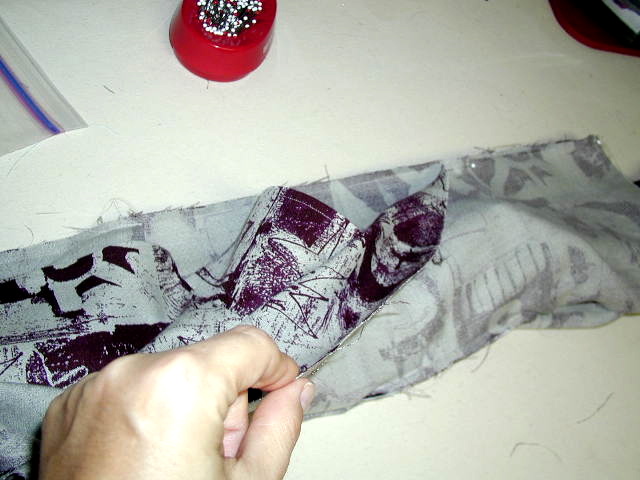
Sew the collar into the neckline with a 1/8" seam (so that you won't have to remove any stitching later). Once you get the hang of this you may be able to skip this step. I still do it because I'm not a big fan of pinning. Having the collar sewn into position gives me one less piece to keep an eye on. Make sure the under collar is next to the outer yoke before sewing.

Step 5: Attach the inner yoke/front facing unit to the shirt/collar unit. I often sew this in two steps, first stitching across the neckline/collar and then down the facings/front edges.

Step 6: 
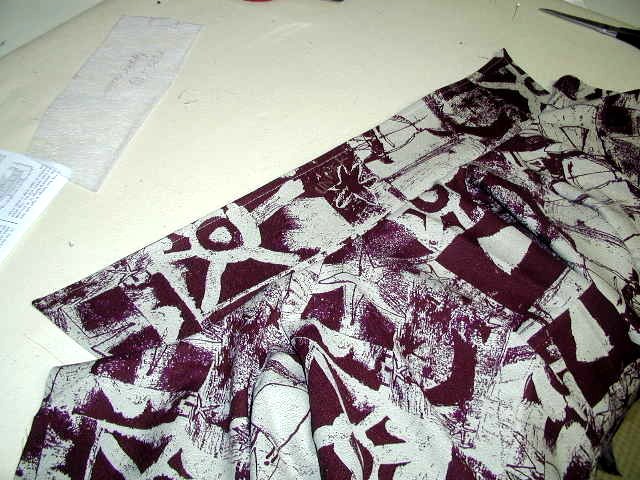
Now you'll need to sew the front yoke seam. Many pattern directions will tell you to slipstitch or topstitch this seam. I sew it by machine from the inside. Hold the raw edges together as they should be sewn and fold the shirt inside. The outer edges will be easy, it gets trickier as you get close to the neckline. You only need to concern yourself with stitching just past the facing edge - don't worry about getting right up to the neckline because you won't be able to.

Step 7: I'm sorry (again) for the blurriness of this photo. This is the front yoke seam pinned and ready to sew.

Step 8: Once this seam is sewn you will have a small unsewn area next to the collar. I just leave it as is. If it bothers you, you can certainly sew it up by hand - if you'll be edgestitching the yoke that will take care of it as well.

Step 9: 
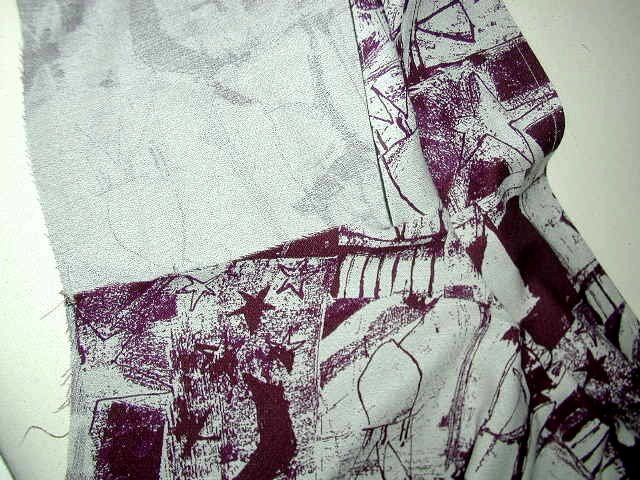
Lay the shirt out flat, right side up, with the front facing you. Roll the back of the shirt up into the outer yoke area.

Step 10: 
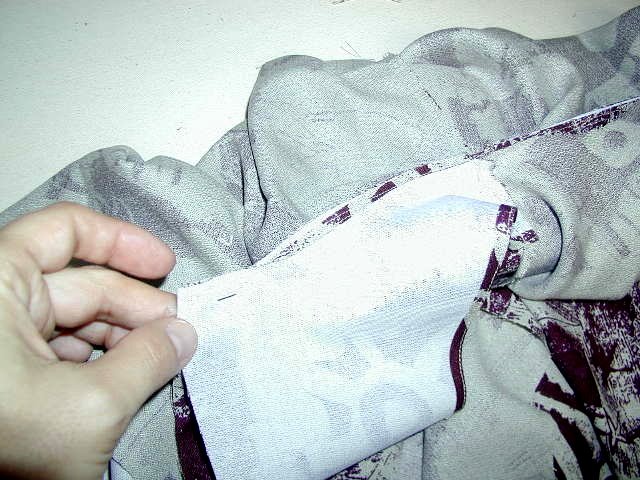
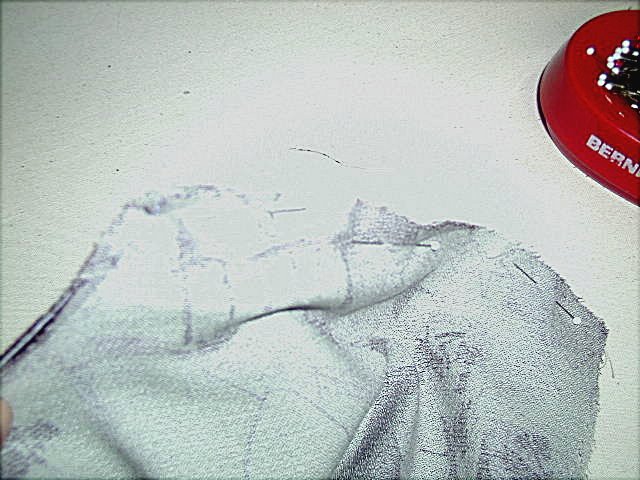
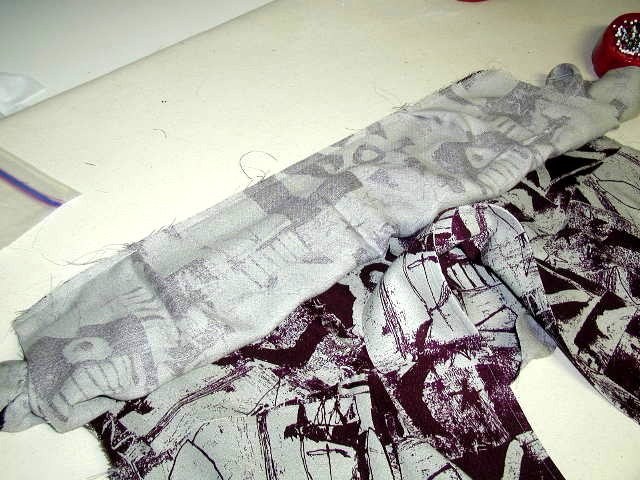
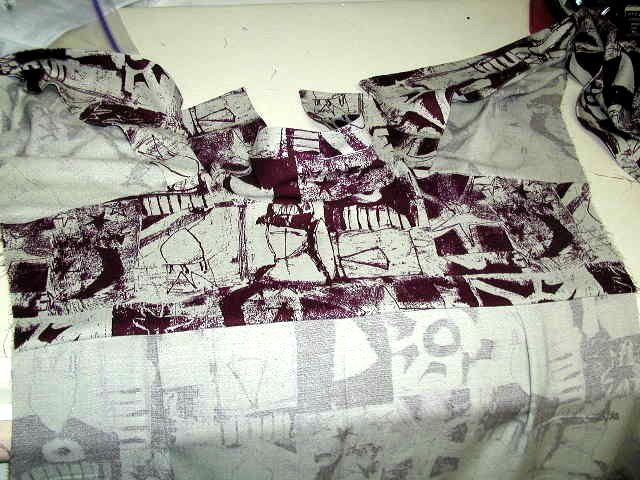
Pull the fronts off to the side and bring the inner yoke around to meet the outer yoke.

Step 11: 
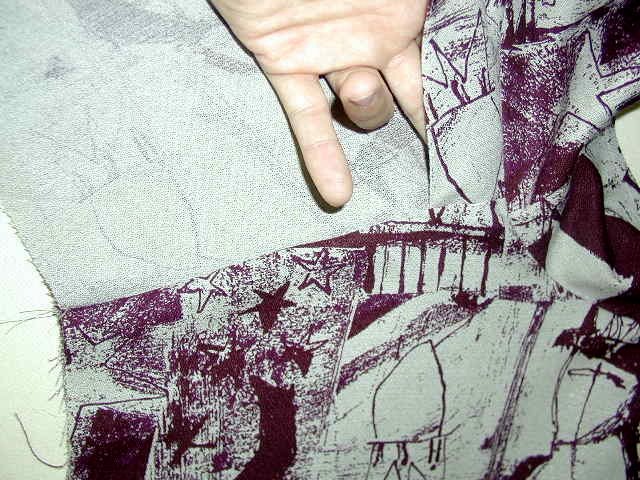
Here's what it will look like - ready to be sewn.

Step 12: Turn everything right side out. Now you can press!

Finished! 
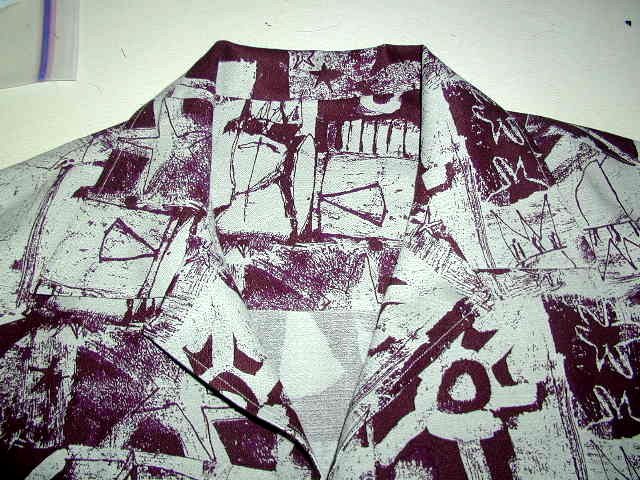
A nice, neat collar/yoke area completely finished by machine.

My hunky model. ;-) Notice that the design matches across the button opening. I always think that's a nice touch - and it's so very easy. Material for a future tutorial?

Thursday, September 21, 2006

Bah!

Good morning, my fellow sewing enthusiasts! Ah, so much to post if only Blogger would let me upload photos! Even Mozilla Firefox hasn't been able to help me the past couple of days. I have one long tutorial to post - don't get too excited as it's a repost of the convertible collar technique from the defunct GigiSews.com site. I was asked to repost it here and am only too happy to oblige. Then, there's my Sunshine Top. I hope I'll be able to upload before I head to the beach on Sunday! Grrrr.

Wednesday, September 20, 2006

Whew!

So I spent a very boring and frustrating day in the jury pool yesterday. I was called for a panel just before lunch but put back into the pool because the case settled. There were about 4 or 5 cases that settled after jurors were selected for the panels. My best friend is a lawyer who represents the insurance companies in personal injury cases - I bet most of the cases that settle at the 11th hour are PI cases. The plaintiffs hold out until the very last moment in hopes of being offered more money. I guess that either the defense offers a bit more money or the plaintiffs take the money on the table and run.

At around 3:00 I was selected for another panel. I immediately had a bad feeling that we were dealing with a criminal case because 50 jurors were selected for the panel. I was right - murder in the 1st degree! The defendant was charged with murdering a woman during a robbery. People close to me know that I am very opinionated about murder and the death penalty, with good reason. You see, in 1989 a very close family member was murdered during a robbery. This is a happy blog so I won't go into it any more than that - I'll just say that not a day goes by that I don't think about her and how much I miss her. Naturally, I was dismissed two hours later. I was very relieved as I think it would have been too much for me to handle emotionally. Today I am back to thinking happy thoughts! :-)

Monday, September 18, 2006

Almost finished!

First, I want to thank all of you for your wonderful, generous comments! I'll admit I was feeling a bit down but who could possibly feel bad with so many encouraging visitors? Certainly not me. Thank you all!

So, what am I almost finished with? Well, I'm very nearly caught up with my work. I have been literally working day and night! I'm still working right now, trying to get a few last minute things finished as I've been called for jury duty tomorrow. Hopefully, I won't be needed. I served on a jury for an entire week a few years ago. While interesting, it was a personal nightmare because I can't sit still that long. I have two speeds: high and off. So, we'll see. I just always wonder what's going on with jury selection - I don't know one other person who has ever served on a jury besides me.

Provided they don't chain me to a seat in the jury box, I will be sewing on Wednesday, Thursday AND Friday - yippee! I am doing the happy-happy joy-joy dance right now! I'll finish up my Sunshine Top and probably cut out another one. I'm headed to the beach on Sunday for four days. The hand-beading I have planned for the next Sunshine Top will be a good take-along project. I'm also going to try to get something cut out that doesn't need a serger and take that along as well. My DH will likely be running back and forth to the restaurant so my Bernina will be my surrogate companion for some of the time. ;-) I no longer have a portable serger and don't feel like taking *that* much stuff with me anyway. Maybe I'll fit and cut out a shirt before I go and plan on making flat-felled seams. I know it sounds weird that I'm taking sewing to the beach with me but I'm not much of a sun-lover so my big Panama hat and I won't be spending more than an hour or two on the sand with a good book. I'll be the pasty one slathering 40 SPF all over herself - under an umbrella. ;-)

Saturday, September 16, 2006

Mrs. Know-It-All

It never fails. Whenever you feel pretty good about yourself something happens that makes you feel very, very small. I've been a member of an online sewing community for the past five years. I absolutey loved the site and it's members and spent many happy hours there looking at people's projects, showing my own and chatting about sewing. I even ran the Expert Forum (a title I was never comfortable with because I'm certainly not an expert) for several years - until my work load became so great that I could no longer handle it. Still, I was very active on the message boards when I was able. I'm certainly not a sewing expert - I will be the first one to tell you that. Instead, I consider myself a sewing student - always studying, always learning, always experimenting. Sewing does come naturally to me, that I will admit. Even back in Home Ec my fellow students always asked me for help. Not because I knew everything but because I was always finished before everyone else.

I'm no longer participating at the site but am still lurking, looking at people's projects and keeping up with what's going on. Now I wish I had just made a clean break. It's pretty humiliating to find out that while you thought you were being helpful, answering people's questions, so many thought you were just being a know-it-all and blowing your own horn. I wish I could go back and delete everything I've ever written. Actually, I could - but that would be entirely misconstrued. Then people would say that I was worried about someone stealing my ideas. They aren't my ideas at all, just things I've learned over the years. Luckily, the way the site is growing I know that I will disappear into cyberspace in short order - a small comfort.

Last week, Mary Beth and I were joking that, if left to our own devices, we might become sewing hermits. Right now, that sounds like a pretty swell idea. I have a small note hung to the right of my desk that reads "sewing washes from the soul the dust of everyday life". Now that's good advice. Time to buck up and sew something.

Where the action is

Some of you have never seen my sewing room and here it is. I know I'm not the only sewer who enjoys looking at everyone's sewing spaces - or am I? The bones of this room have been about the same for ten years but it received a facelift last year in the way of new paint, new hardware, a new floor and wonderful water hyacinth baskets for organizing. It's so nice not to lose pins in carpeting!

Here's the view from the door. That wonderful little Bernette 334DS serger you see in the foreground has been sold since I took these pictures. I was feeling guilty that such a great machine had been sitting idle since the day I bought my industrial serger. I firmly believe that machines need to be used and loved.


The shelves above the industrial serger didn't always hang so high. I moved them up in order to fit my industrial embroidery machine underneath back in 1999. That machine is now housed in my converted garage with my 6-head and the rest of my industrials. Just a quick walk to the other side of the house. I never bothered to lower the shelves back down. It doesn't bother me and gives me more room for my thread racks.

Here's the view to the right - pressing surface, small cutting area (which is usually just piled with fabric) and my Horn thread cabinet. I sure wish the thread cabinet had only deep drawers so that I could fit all of my serger thread in it. I have way too much regular sewing thread to fit so those shallow drawers on top are kind of useless. They hold tools and my knitting needles (I've been learning to knit for several years but haven't progressed past garter stitch).


Here's a little peek into my shop. The 6-head embroidery machine takes center stage, of course. She's about 13 feet long. We actually built the room around her. We layed the carpet, painted, had air conditioning installed and then brought the machine in with a forklift (well, WE didn't, the rigging company did it) and had the fourth wall put up. I usually stay out of here on the weekends - I have to go "home" sometime - but I am swamped with work so the machines are running as I sit here and type.


Okay, I've shown you mine - now show me yours!

Thursday, September 14, 2006

WWTS?

What Would Tim Say? There's not been too much going on in the sewing room lately that I can share with you. I've been working a lot and now have many UFOs hanging around. I need to be inspired. I need Tim Gunn! I never get tired of seeing or listening to Tim Gunn. I want to know what Tim Gunn thinks of my various projects. Will I hear "this is looking beautiful!" or will I get the dreaded "this is a bit Junior" or worse, "it's looking like Holly Hobby" or "carved out of a big log"? Mon Dieu! I think I need a picture of Tim to hang on my sewing room wall - preferably one where he is stroking his chin as he often does, deep in thought. If anybody can prompt me to "make it work" it's Tim!


I hope I don't get into trouble "borrowing" this photo of Tim from Bravo's website. He looks so handsome but it's not what I'm looking for. I'll have to take a nice screen shot from one of my TiVo'd episodes. Or maybe I can join the Tim Gunn Fan Club and send away for an autographed 8x10 glossy. Now, that would be awesome!

Tuesday, September 12, 2006

Yes, still......

I'm still swamped with work but am trying to post *something* every few days so that you don't forget about me. :-)

Awhile ago, my friend Emma asked if I'd monogram 65 napkins for a friend's dinner party. The easiest way to crank out such a large quantity was to put four napkins in a hoop as shown below. I used a 12x12" but this would work equally well with smaller hoops. We hooped tearaway, drew a couple of lines down the center in each direction and stuck the napkins on with KK3000. I always use KK3000 with my either cutaway or tearaway as I absolutely detest sticky paper. Not only is it expensive, it doesn't provide enough stability on it's own. If you have to add a sheet of tearaway, what is the point?

If you look very, very closely, you can see a tiny placement dot on each napkin. We made a little corner template from paper to make marking a breeze. After sewing the first initial, I simply used my machine's rotate feature to sew the rest. With this method, we were able to embroider 24 napkins with each hooping (my machine has 6 heads). This went very quickly - we started around 10:00 a.m. and were having lunch out a couple of hours later.

Friday, September 08, 2006

Still working......

Yes, I'm still at it. Four of my teams are in a tournament this weekend which, ordinarily, would not be a big deal. But add in many days of delay due to UPS closing in anticipation of tropical storm Ernesto (which turned out to be nothing more than a mild rainstorm) and a holiday weekend and you have me about a week behind on my work. The tackle twill split front logos for one set of uniforms took forever and didn't arrive until late yesterday afternoon. I just bit the bullet and stayed up until 2:00 a.m. sewing everything onto the vests. I did not want to face them today! As you can imagine, I can't wait until I'm back on track and have some time to spend in my sewing room - after I catch up on my sleep.

Tuesday, September 05, 2006

Fun, interrupted

It seems that everytime I get really deep into a couple of fun sewing projects I am interrupted by W O R K. :-( It's just such a bummer! Sunday night and yesterday I laid a glass block divider in my husband's restaurant (not only loads of fun, haha, but the mortar sucks every drop of moisture out of your hands). Then, today, it's back to work, work, work. Blech. And, naturally, everyone needs their order yesterday. I need one of those coffee mugs that says "lack of planning on your part does not constitute an emergency on my part"! :-) Let's face it, I am just down in the mouth today knowing that I will be trapped in my shop day and night for the rest of the week. The only thing that will bring a smile to my face is the thought of watching Project Runway on Wednesday! In the meantime, I'll be watching this wraparound hat logo embroider out about fifty times. I know it makes you want to rush out and start your own embroidery business, doesn't it? Admit, you know it does. ;-)

Sunday, September 03, 2006

Hot Patterns Sunshine Tops - Part 3

Well, my plan to move some of the gathers further up over the bust didn't work as well as I'd hoped. You can see from the Very Bad Bathroom Mirror Photo (I'm sorry, I know it's blurry) that it causes weird wrinkles/folds above the bust. I should have been able to anticipate that. Plan B: I've marked a new gathering area on the neckband and will need to rotate the FBA to a vertical dart and rotate that out at the side seam. I really want to get this just right because I know I will be making this top again and again - it's really pretty.

Saturday, September 02, 2006

Hot Patterns Sunshine Tops - Part 2

I had all but forgotten about these really cute heat transfers I purchased a few months ago from Shop Onion. This silver Blomster print is perfect for adding a little embellishment to the neckband of my Sunshine Top.


I decided to use a partial motif on the side of the band. I placed a Teflon sheet underneath so that the excess wouldn't fuse to my press' silicone pad. If you don't have a Teflon sheet you can put a piece of scrap paper or fabric underneath so that the transfer won't stick to your pressing surface.


Applying the motif is easy! Just fuse at 300F for 10-12 seconds. I'm using a commercial heat press but it's just as easy to apply these transfers with a dry iron set just above wool.


I'm very happy with the placement of this little detail. This pattern is great! It's such a pretty top. I thought I could get away without a full bust adjustment because of all the gathers but I was W R O N G. In fact, if you are full-busted I would recommend starting the gathers further up the neckband to fill in the hollow above the bust a little. I am going to make my FBA and then transfer the dart to that area. Oh well, that's why it's necessary to make a test garment in knit. My final version will be in a rayon/lycra knit. I think I'll cut out and fuse the neck band now and get started on my beading. Woohoo!