Decorative Elastic Finish
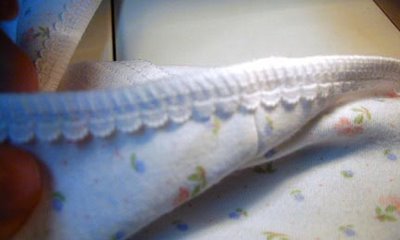
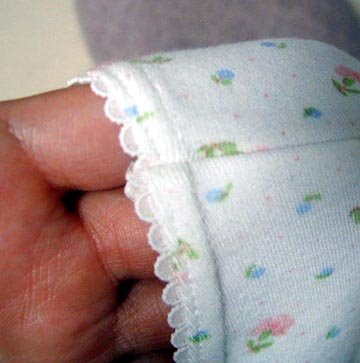
Now that so many of you have coverstitch machines, I thought I'd rerun this tutorial from 2001. This is a very easy and neat (yes, I love my sewing to be neat and tidy!) way to finish a knit. I'd originally titled this the Picot Elastic Finish but there are so many types of decorative elastic available today that I felt it necessary to change the title. We normally think of this finish as being used in lingerie but it works equally well on the necklines and armholes of street clothes. Here I've used a ruffled elastic to finish the edges of the Loes Hinse Tank. Not only does it look nice it's also very quick and easy!

The first thing you'll want to do is check the seam allowances. They should be equal to the width of your elastic (not counting the decorative edge). If your elastic has a very wide decorative edge, you might consider trimming the neckline down. Otherwise, the finished opening will be a bit smaller - not really a problem on a deep neckline but it could be uncomfortable on a jewel neck or at the underarm.
Next, you'll need to sew up one shoulder seam - I usually sew up the right side first. Then you will serge the elastic to the edge right sides together. It isn't necessary to stretch the elastic. Instead, apply it in a 1:1 ratio. When you turn the elastic inside you will be turning a smaller circle (the cut edge) into a larger one (the body of the garment) so gaping will not be a problem.


Then, simply turn the elastic to the inside and coverstitch along the edge from the right side.
Lastly, you will sew up the remaining shoulder seam. I also like to tack the seam allowance down with a few straight stitches to keep it in place.


The finished product:

If you are finishing armholes on a sleeveless garment you will go ahead and do that now while the side seams are unsewn.

The first thing you'll want to do is check the seam allowances. They should be equal to the width of your elastic (not counting the decorative edge). If your elastic has a very wide decorative edge, you might consider trimming the neckline down. Otherwise, the finished opening will be a bit smaller - not really a problem on a deep neckline but it could be uncomfortable on a jewel neck or at the underarm.
Next, you'll need to sew up one shoulder seam - I usually sew up the right side first. Then you will serge the elastic to the edge right sides together. It isn't necessary to stretch the elastic. Instead, apply it in a 1:1 ratio. When you turn the elastic inside you will be turning a smaller circle (the cut edge) into a larger one (the body of the garment) so gaping will not be a problem.


Then, simply turn the elastic to the inside and coverstitch along the edge from the right side.
Lastly, you will sew up the remaining shoulder seam. I also like to tack the seam allowance down with a few straight stitches to keep it in place.


The finished product:

If you are finishing armholes on a sleeveless garment you will go ahead and do that now while the side seams are unsewn.


7 Comments:
Gigi - this is brilliant! - it never occured to me to use a coverstich in this way.
Pretty. I like that.
That looks very nice Gigi, now if I can just convince my DH I **need** a coverstitch machine ~ I'm not sure he'll buy into it tho! ;-).
After reading your tutorial and many of Debbie Cook’s tips on PR, I bought a Babylock coverstitch. I have been practicing this technique. It is great!
Celeste, this particular elastic came from Stretch & Sew but I don't think they have it anymore. I have purchased a lot of decorative elastic from the seller fr8rain on Ebay. Kathy has nice stuff that you can't find anywhere.
I'll have to brush up on my Ebay skills I guess. But thanks for the source.
hello,
i recently bought a used kansai special rx-9803 coverstitch, with a post. since getting it i've given myself a crash course on coverstitch readjustment and re-timing when the machine started skipping stitches and not sewing at all. the knife also broke and a particularly handy friend of mine made me a new one so i wouldn't have to order the $54 knife itself. i have gotten it sewing perfectly (timing was WAY off) and have started in on hemming the 100 thin jersey t's i have to do for my spring orders- except i noticed the feed dogs were putting tiny holes in the fabric. SO i spoke to a technician who recommended that i sand the feed dogs. i did that and when i put them back in, the thing would barely sew 2 inches- the stitches are all piled up on top of each other and the threads seem to be getting knotted up underneath, in the looper. i'm just wondering if any one has had any similar experiences with these symptoms- and if you have any suggestions, my machine is hooked up to an air compressor and is quite heavy- i'm trying to avoid dragging the whole contraption to a technician....
thanks!
Post a Comment
<< Home