


Collar on stand - Part 2
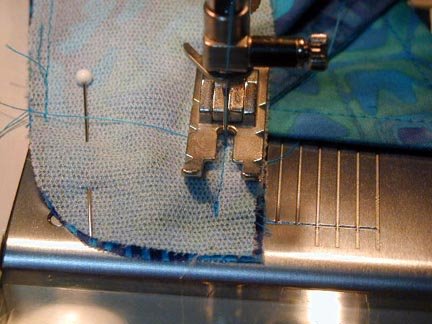
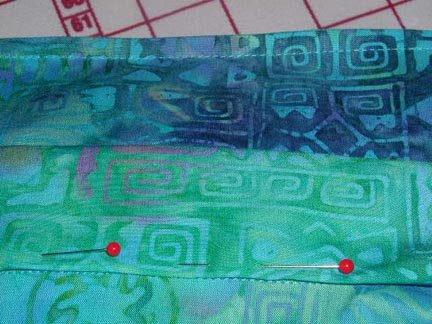
Today we are going to finish up the band. Pin the outer band onto the inner band, right sides together. As you can see in the photograph, I have carefully tucked the front edge of the shirt up into the bands. This will allow me to stitch around for a nice neat front edge. I'm normally not big on pinning but, in this case, it helps to keep the layers in position.

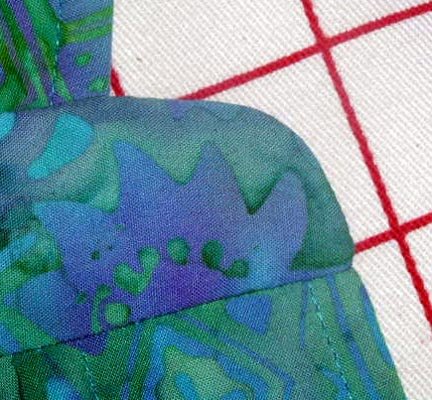
Here is where your accuracy in attaching the inner band will pay off. I begin my stitching about 3/4" in from the front edge (or as much as the fabric will allow - sometimes more, sometimes a little less) and pivot exactly where my previous stitching ends.


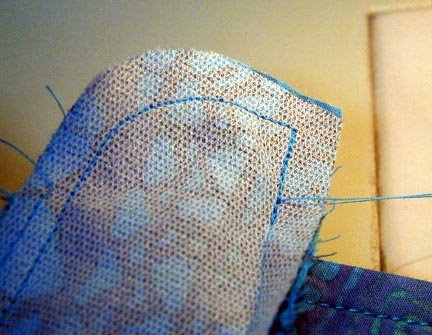
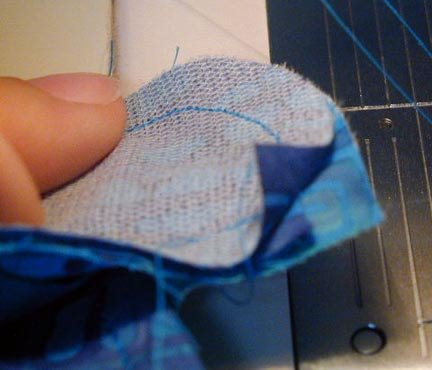
Always check to make sure you haven't accidentally caught anything you shouldn't have in your stitching before trimming.

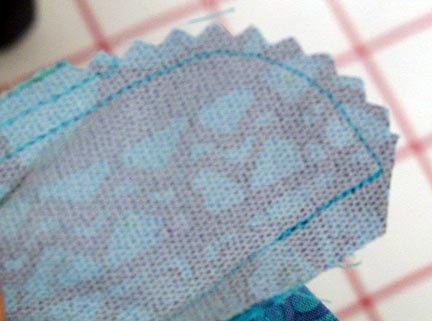
I simply cut across the corner and then trim the curve with pinking shears. When using 1/4" seam allowances, it isn't necessary to do any additional trimming.

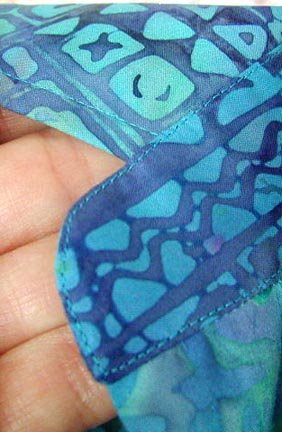
The front edge is nice and neat from the outside.

And from the inside.

The last step is to edge stitch around the band, closing up the remaining neck edge at the same time.


That's it! This entire process, with practice, should take you no more than a few minutes and will give you a great result every time. I hope you'll give it a try.

Here is where your accuracy in attaching the inner band will pay off. I begin my stitching about 3/4" in from the front edge (or as much as the fabric will allow - sometimes more, sometimes a little less) and pivot exactly where my previous stitching ends.
Always check to make sure you haven't accidentally caught anything you shouldn't have in your stitching before trimming.
I simply cut across the corner and then trim the curve with pinking shears. When using 1/4" seam allowances, it isn't necessary to do any additional trimming.
The front edge is nice and neat from the outside.

And from the inside.
The last step is to edge stitch around the band, closing up the remaining neck edge at the same time.
That's it! This entire process, with practice, should take you no more than a few minutes and will give you a great result every time. I hope you'll give it a try.
posted by Gigi | 10:47 AM
![]()
7 Comments:
Thank you Gigi for such a well-illustrated and clear tutorial. It makes me want to make a shirt right now!
great tutorial as ever.... As soon as I finish the 234423324 other projects for me, I will come to the shirt I promised DH :) and will try out your technique
How do you top stitch the neckband AND stitch in the ditch so perfectly on the reverse side?
Great tutorial. Your photography is perfect, I wish I could conquer a camera. A lot of my members love your blog. : )
情趣,情趣用品,巴黎,
SM,G點,按摩棒,
跳蛋,按摩棒,
飛機杯,充氣娃娃,
自慰套,自慰套,
情趣娃娃,自慰器,
充氣娃娃,角色扮演,
潤滑液,跳蛋,
情趣禮物,情趣玩具,
威而柔,
情人趣味千奈,情人趣味用品,
情趣味用品,
What a great tutorial! Your work is wonderful- it's so good to see fashion still alive, even in Florida!
I like how precise this guide is for creating neat band edges.
Post a Comment
<< Home